Showing posts with label tutorial. Show all posts

7.18.2013

The Plane Project Continues.....


Back when I began this blog in February 2011, I posted a project I recently did and provided a tutorial. I got a huge response and activity over it. However it has been a blessing and a curse. I've gotten to "meet" so many people through it and many have shared pictures of their completed projects! But many have failed at the project. I've received urgent messages and emails from panicked people who (for what ever reason) the project just didn't work for them. It could be any reason from a certain paper type to a certain printer/ink type I'm just not sure.
A while back I tested my own tutorial and came up with the same results.  I had a few reader requests for custom projects and I sold a few.
Today I'm posting another template for the project, this time the entire piece will be 5ft not 8ft as the original.  You will need to cut (or have the store) your plywood into 15"x15" squares this time. The Image is different too.

(This time I added a charcoal pencil to the mix and really liked the contrast it created)

So...If you want to give it another try, or like the smaller size click here to download the PDF files for the template. You will still need to follow the original tutorial.
Good Luck!

8.18.2011

monster doll tutorial

Well here it is .. finally. The Monster Doll Tutorial.
These were extremely easy!
I used leftover and scraps of fleece.

First I free handed monster patterns. I used 8.5"x11" paper so they would stay small.

Then trace and cut out two sides per monster. On one side cut out desired facial features and stitch on.
Put the right sides facing each other and stitch along edges leaving a 1-1.5" opening. turn Monster right side out...and stuff. Hand stitch opening closed!


8.08.2011

A Sock Monkey Inspired Kid's Room - BUY or DIY - #12 Floor Poufs!

Working with the Cre8tive Concept Board - "A Sock Monkey Inspired Kid's Space" Here is what you can BUY or DIY...Today
OR

12. The "Poof"
 

From.........
Cre8tive Concept Board


I made these for my kiddos. I really like that they have handles to be lugged around!
Check this tutorial out here
Or this one here

Check out the previous BUY or DIY posts ....

8.04.2011

DIY Coffee Table + tutorial

This tutorial is part of my Creative Concept- A Kid's Space Inspired By a Sock Monkey. Check it out here
.
When I found this rustic/reclaimed coffee table online I was in love! Looking closer I knew this was something I could DIY. I drafted this plan (below) on cad - estimating dimensions using the original picture as my inspiration.

Material List:
3- 1"x6"x8'
1- 1"x6"x4'
1- 1"x4"x8'
(I used cheap boards from LOWE'S I spent $23.68)
wood glue
nails
screws
jigsaw
chop saw- or a form of making straight cuts

I made mine a little smaller than the above plans...Scale it to your needs.

Print the next two images to use as your template for jigsawing the legs.


(These are printed on 2  - 8.5x11 printer paper. Match up and tape together then cut out.)

If you are not comfortable with a jigsaw - find someone who is (husband maybe?) I am vaguely familiar with it because of some of my college design classes. I didn't find it to be that difficult to cut this pattern.

Cut all your 1x6's...
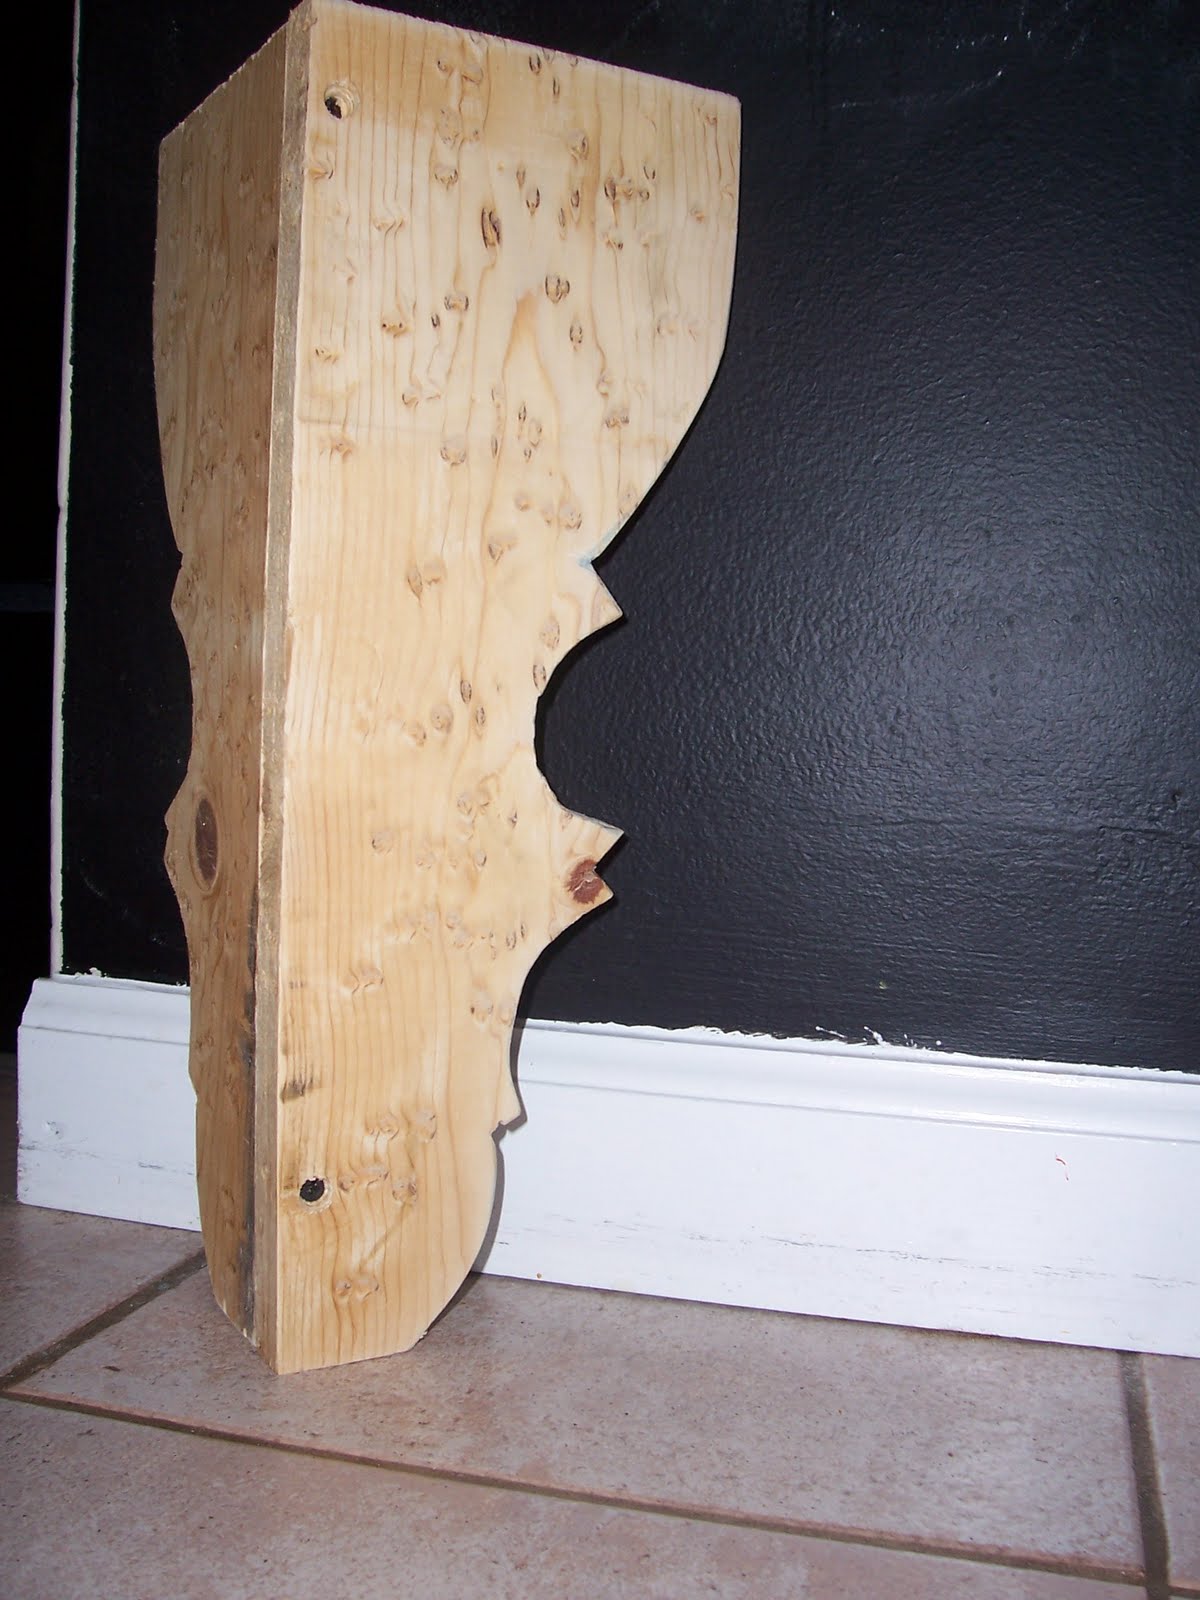
8 - 18" pieces for the legs
4 - 48" pieces - planks for table top

once you have your 8 leg pieces cut trace pattern on to pieces and jigsaw.

you will use 2 patterned pieces to make one leg. Attach using screws. I used a pre-drill counter sink so my screw heads wouldn't show.


Next put the table top together. There are a few different options for this. You can buy a "pre-made" wood slab top (this will be more expensive than using the 4 - 48" 1x6's)
If you use the 4 - 48" 1x6's attach these together - use a jig or biscuit joint. If you can't do either of these (I can't!) create a brace of plywood or a rectangle using 2x2s to nail or screw each board into to create a solid top.

to attach legs flip the table top over and place legs where you want them

I glued the legs on first then nailed them in from above. I usually would say this is not a good way - being as that your nail hole will show on the table top - but I heavily distressed the entire table so they won't be noticed. You could also use L-brackets.
Then I added the "stretchers"  these are your 1x4s. I would not cut these until this point. measure between each leg to get your exact measurement.
Attach the same way you attached your legs.

Give the entire table a good sanding.

The finish:You can do this many different ways.....paint, stain, whitewash...etc.
I watered down a brown latex paint and brushed it on, then I distresses (hammering, nailing, basically beat the hell out of it!)

Then I sanded again - removed most of the paint and added a thin coat poly.....
and finished with something that looked like this


I really love it!
I hope this tutorial helps! I had a tech problem with the memory card in my camera and lost most of my pictures :(
I am NOT a furniture builder so my "techniques" are probably pretty unconventional. Please use this tutorial as a guide and make improvements as you go!
Good Luck!

8.02.2011

BUY or DIY # 8 - The Coffee Table

Working with the Cre8tive Concept Board - "A Sock Monkey Inspired Kid's Space" Here is what you can BUY or DIY...Today
See what we did last week....
#1 & 2 Accent Pillows
#3 Robot bedding
#4 CableKnit Bedding
#5 Platform Bed
#6 The Sock Monkey
#7 Hanging laterns and poofs
OR

8. Reclaimed Wood Coffee Table

                               
From.........
Cre8tive Concept Board


Buy this table above ...A little pricey but really cool!
coffee table

OR......
 

 I finally finished the table! I decided to DIY this one myself!
When I created the Concept Board - Kid's Space Inspired by a Sock Monkey- I knew I wanted incorporate a "play table". When designing for a child I try to use pieces not just for children, but pieces that can grow with the family. I look for items with a "fun and playful" style but can re purposed throughout time.
Coffee tables make perfect play tables. They are just the right height for a little one to stand and play. Later they can be used as a "conversation" area for a Tween/teen.

When I found this table (above) I loved the curved lines of the legs and the "rustic reclaimed" wood.
I used all new (cheap) boards and distresses and aged them myself. This was a really easy DIY because in this case imperfection = character!


Tutorial here..... So you can do it yourself  too!

Stay tuned for more Cre8tive concept boards suppling you with online tutorials, craft ideas, home design ideas, and free room design!


UndertheTableandDreaming

7.29.2011

A Sock Monkey Inspired Kid's Space - BUY or D.I.Y - #6 Sock Monkey

Working with the Cre8tive Concept Board - "A Sock Monkey Inspired Kid's Space" Here is what you can BUY or DIY...Today
OR

6. A Sock Monkey
Schylling Sock Monkey

From.........
Cre8tive Concept Board


Ok... I have never made a sock monkey, but I know people who have...my grandma being one!
So here is a tutorial to get you started
The sock monkey also has a pretty cool history check it out here
If you attempt a project I'd love to see it! Comment and link to your project!