9.29.2013

$25 DIY FIRE PIT | for the home


We've been working on the great outdoors. More to come on that... it involves tearing down a sunroom and MAJOR yard work!

Anyway we created an "extention" of our patio for a fire pit area.  We were lacking one thing...the fire pit.  Since this was a low budget project and only in phase one it called for a DIY.

Here's how...
Get a roll of hardware mesh like this one here.
Unroll it and snip it in half horizonally. Now you have two 12" pieces of 10ft mesh.
Make an outer ring about 36" in diameter and an inner ring about 8" smaller.
Lace the ends together with the long length of wire that the roll was wrapped up with in the store.

Pour in some gravel to level your base
(I used bagged gravel from Lowe's $3 per bag - about 4-5 bags total)


Level! This is important...You can not redo this later!
Slowly fill and fill the space between the mesh rings. I added a few large rocks I found around the yard...looking back I wish I had not and would have just left it all white gravel.
 You'll also need a few inches of gravel in the center where the wood will go.


Sit back and enjoy!
Soon I will share the backyard progress...phase one
Hopefully phase two will look more like this ;)
source


Linking Here


9.26.2013

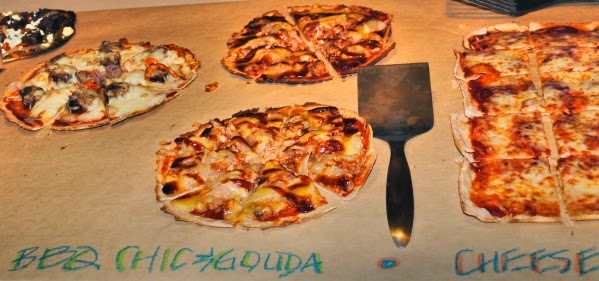
Pizza Party! | food


Most people have BBQs...lately we have Pizza Parties!
It seems to be our new go to party plan when hosting friends or family.
I don't even pull out all my serving ware...we just use butcher paper!


I don't believe this needs much explanation but I will give you the recipe!

Crust:
3 cups whole wheat flour
2 and 1/4 Teaspoons yeast
1 cup water (warm)
2 tablespoons oil
1 teaspoon salt

Add yeast and water in stand mixer with the dough hook
let stand for 5 min
add the rest of the ingredients and mix on medium for 8-10 min
divide into 10-12 balls - let rise about 30min (optional)
heat flat skillet on stovetop (oil optional)
roll out each ball to a 8" circle and lightly brown each side

If I'm not hosting a party I freeze these and have a pre-done crust ready at anytime!

Topping ideas:
Tomato moz. pesto basil
sautéed peppers onions and sausage (red sauce or pesto) with goat cheese <--my fav!
classic pepperoni
BBQ chicken
the possibilities are endless!

Bake for 8-10min at 450


9.10.2013

Plane Project detail and questions

A few people have been asking for missing parts of the plane project templates...
http://thecre8tiveoutlet.blogspot.com/2011/02/15-this-missing-link.html  <---this will help

if it's not listed on the downloads it's because that particular "box" was blank/negative space.
Thanks!


7.18.2013

The Plane Project Continues.....


Back when I began this blog in February 2011, I posted a project I recently did and provided a tutorial. I got a huge response and activity over it. However it has been a blessing and a curse. I've gotten to "meet" so many people through it and many have shared pictures of their completed projects! But many have failed at the project. I've received urgent messages and emails from panicked people who (for what ever reason) the project just didn't work for them. It could be any reason from a certain paper type to a certain printer/ink type I'm just not sure.
A while back I tested my own tutorial and came up with the same results.  I had a few reader requests for custom projects and I sold a few.
Today I'm posting another template for the project, this time the entire piece will be 5ft not 8ft as the original.  You will need to cut (or have the store) your plywood into 15"x15" squares this time. The Image is different too.

(This time I added a charcoal pencil to the mix and really liked the contrast it created)

So...If you want to give it another try, or like the smaller size click here to download the PDF files for the template. You will still need to follow the original tutorial.
Good Luck!

6.10.2013

5

Above our mantel has been a bare spot for about 6 months now. Although this room was the first room to be "somewhat" finished,  I left the mantel bare. I still don't know what I want to do up there, but I knew I didn't want to spend any money on something that wasn't a "final" fix. So one afternoon K and I got to work. I had remembered seeing this image (below) and loving the "5" above the TV. Since there are 5 of us I thought why not. I had a 24" square piece of plywood so I painted and then K "distressed". FYI don't let a 6 year old get crazy with sandpaper...we almost didn't have a 5 left:)

It's not a forever fix but it works for now:)